How does the water cycle work?
Here are the three steps of the water cycle.
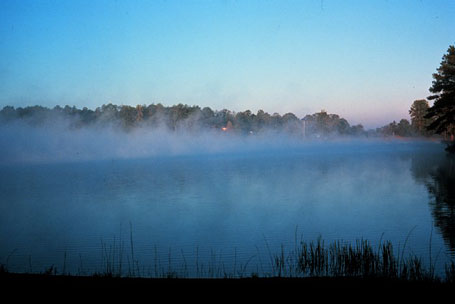
Evaporation
Evaporation is when the sun heats up water in rivers or lakes or the ocean and turns it into vapor or steam. The water vapor or steam leaves the river, lake or ocean and goes into the air.
|
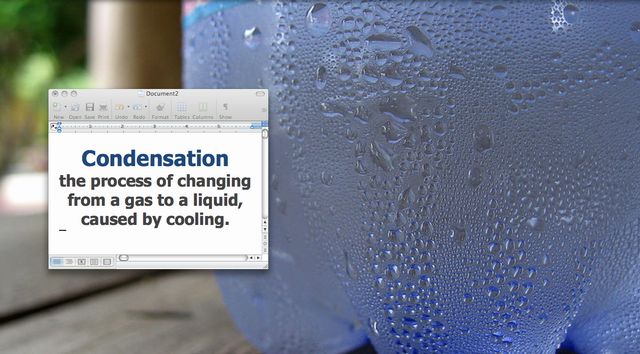
CondensationWater vapor in the air gets cold and changes back into liquid, forming clouds.
|
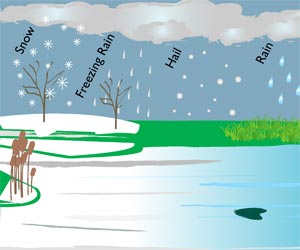
Precipitation
Precipitation occurs when so much water has condensed that the air cannot hold it anymore. The clouds get heavy and water falls back to the earth in the form of rain, hail, sleet or snow.
|
Water Cycle Song!
|
Watch this short video to learn about the water cycle!
|
After the video this is the worksheet you will be completing.
| ||
Time to see how the water cycle works!
For this experiment you will need a quart sized baggy, small paper cup, water and a piece of tape. Students should be divided up into small groups with 3 or 4 students per group depending on class size. Each group will need a scribe that is assigned by the teacher.
1) Fill the small paper cup 3/4 full of water.
2) Place the small paper cup that is 3/4 full of water into the plastic baggy and seal it.
3) Then tape the baggy to a window where the sun shines in.
4) Make observation over a course of a school week (5 days).
5) Create a time toast. (Click TimeToast button to take you to the website)
Introduction:
How does the water cycle work?
Task:
During this lesson students will watch a video teaching them about the water cycle. After the video they will do a worksheet to show their understanding of the water cycle. Then students will preform an experiment. The experiment will involve the students placing a cup with water in a plastic baggy and sealing it. Then they will tape the baggy to a window that the sun shine in and observe what happens over a course of a week. With this they will take notes of their observations throughout each day. Putting the time and date on their observations they will then make a time toast to log their observations.
Process:
Step-By-Step
- Short introduction on the water cycle led by the teacher.
- Explain what the students will be doing. Watching the video, worksheet and experiment.
- Have the students watch the video on the water cycle.
- After the video have a short discussion with the students to see what they learned.
- Then hand our the worksheet for the students to complete, individually.
- Once the worksheet in completed and the students have a good understanding of what the water cycle is. They will be divided into groups of 3 or 4 depending on class size for the experiment.
- Their will be a designated scribe in the group assigned by the teacher. This person will be responsible for taking all notes of the project. All members of the group will provide the scribe with information on the project as well as the scribes own findings.
- Supplies will then be handed out and the lesson led by the teacher.
- Each group will receive a baggy, a small paper cup, piece of tape and a container of water.
- Students will fill the paper cup 3/4 full of water then place it in the baggy. Seal the baggy and tape it to a window where the sun shines in.
- Over the course of a week the students will observe and take notes 3 times a day on their baggy. Things they should note are level of water remaining in cup, condensation inside the bag, whether there is standing water inside the baggy that's not in the cup (etc.).
- Then students will take the notes from each day and put their findings into a time toast.
- Once the week has ended we will talk as a class about the different observations that were made and how heyt relate to the water cycle.
- Students will be get a participation grade for the experiment and then a completion grade for the assignment based on the number of correct answers they got.
Resources:
YouTube video: https://www.youtube.com/watch?v=TWb4KlM2vts
Evaporation Picture: http://waconacycle.weebly.com/uploads/1/0/9/2/10920180/2005412_orig.jpg
Precipitation Picture:http://www.fondriest.com/news/wp-content/uploads/2013/06/precipitation.jpg
Condensation Picture:http://msaharms.pbworks.com/f/1284757440/Condensation.jpg
Water cycle experiment: http://www.weatherwizkids.com/experiments-water-cycle.htm
Water cycle worksheet:http://www.education.com/worksheet/article/label-the-water-cycle/
Teks
Earth and space. The student knows that the natural world includes rocks, soil, and water that can be observed in cycles, patterns, and systems. The student is expected to:
(A) observe, compare, describe, and sort components of soil by size, texture, and color;
(B) identify and describe a variety of natural sources of water, including streams, lakes, and oceans; and
(C) gather evidence of how rocks, soil, and water help to make useful products.
Evaluation:
The worksheet will have a completion grade based on the number of correct answers for a total of 7 points. The worksheet will then be placed in the students portfolio.
The experiment will be a participation grade based on a scale of 5.
Did the student help put the experiment together?
Did the student assist in helping make observations?
Did the student help the group create the time toast?
Did the student actively participate in the class discussion? (2pts)
The experiment will be a participation grade based on a scale of 5.
Did the student help put the experiment together?
Did the student assist in helping make observations?
Did the student help the group create the time toast?
Did the student actively participate in the class discussion? (2pts)
Conclusion:
Once this lesson in complete students should be able to identify the different steps in the water cycle.
